
Everyone even Google loves the faster web site loading, and hence it increases the website visibility in Google and the other leading search engines. To make the site load faster in a visitor’s browser, we have done some of the easiest steps to make your website loads faster with the help of Cloud Flare and WP Rocket.
Everyone loves wp rocket plugin for the three features :
- It just takes 5 minutes to setup WP Rocket.
- Increase in 80% of the web performance of your WordPress site.
- Can be integrated with CloudFlare.
We will first proceed with the wp rocket setup and followed by CloudFlare and learn how to optimize a website. I am have used this plugin and proceeding with the wp rocket review and configuring best settings for wp rocket.

Configuring the Basic WP Rocket:
Install the WP Rocket WordPress Plugin Now Goto wp rocket settings Page

Step 1. Setting up the WP Rocket Cache
Going to the first option which is known as Cache as shown below and checks the one which I have selected.

The above option will enable caching for the mobile devices as well as for the owner of the WordPress.Now if you ask why the owner is being cached ?
This is because after configuring the cache system we were unable to see the effects and the changes if we uncheck the option Enable caching for logged-in WordPress users
So to see the changes in the WordPress site we need to enable this.
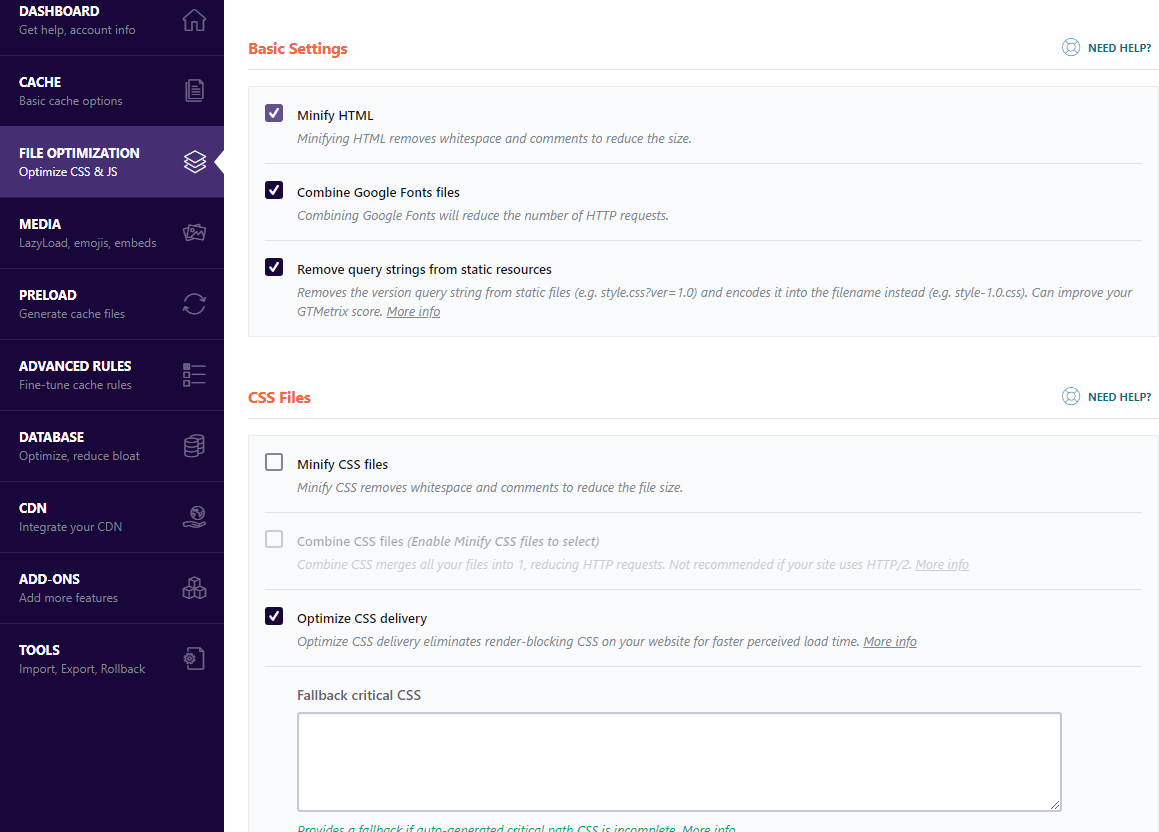
Step 2. Minifying the Files
Choose the ones which I have shown below image which will minify the files and combine the Google Fonts file also remove the query string from the WordPress site also optimize the CSS files so that there is no huge http connections.
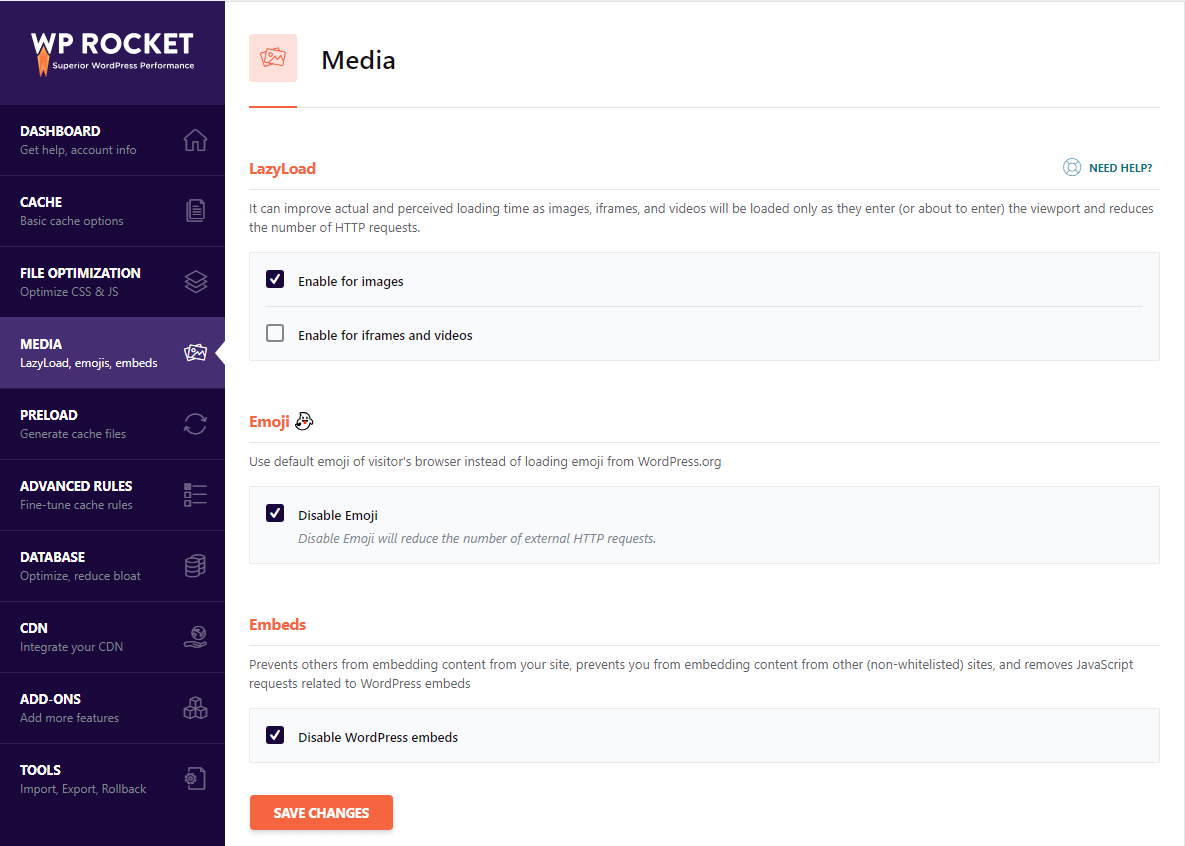
Step 4. Setting up the media optimization
Lazy Load is the best way to load the text then images as your visitors loves to read then to see the images , if the images loads faster then the text will load too slow and hence your visitors will not get what they want or to read.
Checkmark the options which I have shown below.
Step 5. Preloading the content to server faster
Preloading content helps to increase the faster performance and minimizing the load of your website. Preload always try to cache the pages in the folder so that the pages were served faster later.

Prefetch DNS is also a part of preloading the external content in user’s browser by serving the request on user’s end.

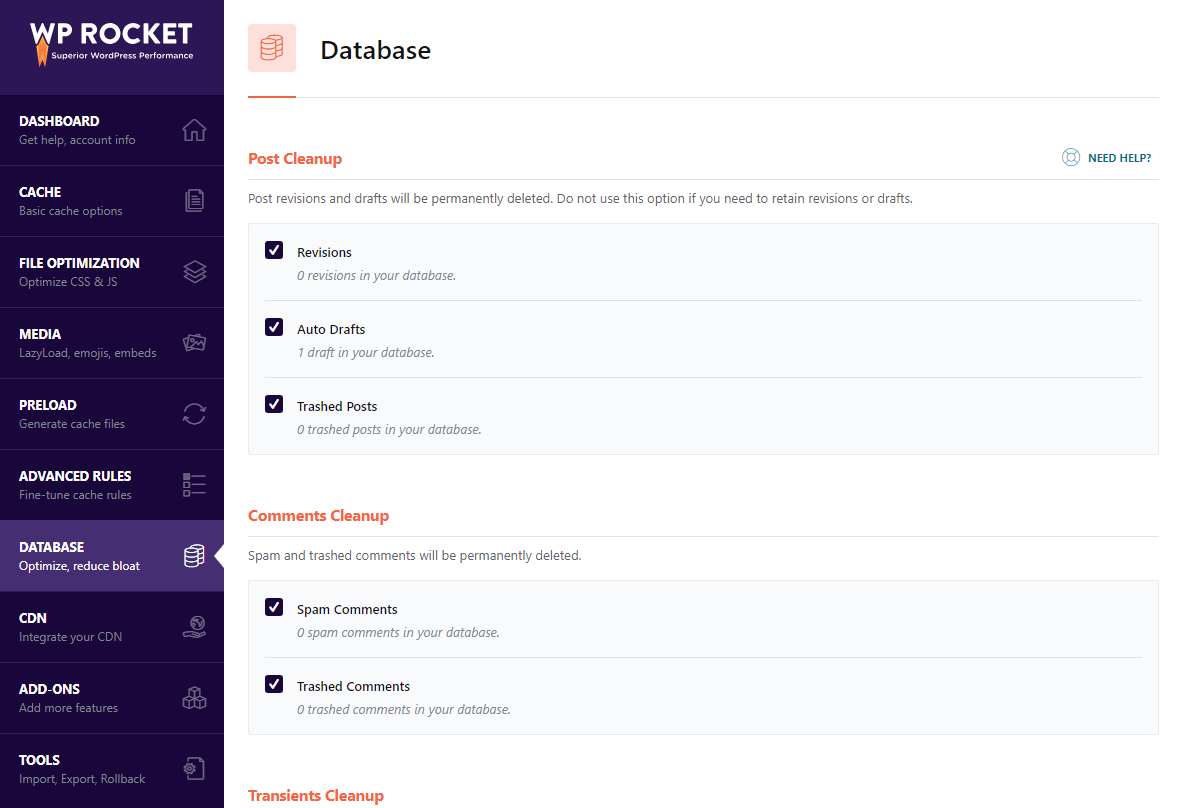
Step 6. Database Optimization
WP Rocket not only for serving caches but also helps to optimize the Databases in order to perform your website faster as optimized databases are the good sign of reducing the load of your website.
Now you are done and let me describe every function in detail :
LazyLoad:
This helps in loading the images slowly, and first, the website will load, and as your visitors browse the website and scroll the website, the images will appear slowly. This helps in reducing the bandwidth and on the other hand, it helps the user to load the images as much as required. So enabling this option is best and does not harm the page and hence increase the website speed.
Mobile cache:
Mobile Cache is best for your mobile visitors who loved to experience faster-loading speed though I suggest you to use AMP WordPress Plugin which helps Google to detect your website as AMP compatible and loads your mobile version page in one click.
User cache:
This is optional as you might not want to view the cached version or might be trying to experience how your visitors are getting your web pages viewed. So enable or Disable it if you don’t want to see the cached version and want to view non-cached version of your website.
SSL cache:
This is enabled by default as to cache the https version of your website, if you are using my hosting platform then your website will be getting the free SSL certificate, and you can cache the https pages, and the cache is best to optimize your website performance.
Emoji cache:
As WordPress provides several emojis and blah blah scripts for populating your blog and increasing the load time, I will suggest it enable this option so that they are being minimized from loading.
Embeds:
Who wants to loads their website from Iframe and under a website? To enable this to block those websites which are trying to open your website on their website. This one is the best option which other Caching plugins do not give,
Cache lifespan:
This option helps to reduce a load of your website as this option cache the pages and keep it in your cache folder so that everyone is being served the cached version instead of a direct un-cached version of your website which helps in decreasing the CPU usage and RAM usage. Adjusting this to unlimited is best in case you are getting high traffic and high CPU usage. If your website is a Regularly updated blog, then I will suggest your website be hosted on a Dedicated Server as this option then need to be changed to 30 Minutes or depending upon you update your blog on a regular interval. I suggest marking this as 24 Hours as best.
Minify files:
Minifying the files helps in reducing the requests by combining the files into one. Some theme supports reducing or combining the files into one but some themes do not support this but HTML can be minified as Basic. CSS and JS should be chosen with caution that it does not break your theme styling so enable them and check whether your website template is getting broken or not, if it work with enabling CSS and JS then go for it as you are lucky with your WordPress theme else I am sorry that your website template is not allowing to compress the files into one.
Combine files:
Combining the files into one will help the visitors to load only one file instead of several files and requests. Google fonts are having several files loaded into user’s browsers which are not compulsory so enabling this option will help you to reduce the load time of your website.
Remove query strings:
Query is hated by the popular website analyzer even the query ios being unable to cache in the browser as it is dynamic but thanks to WordPress which allow caching the query by the latest technology of removing the query strings. This plugin help to remove the query strings and gets your web pages cached.
Render-blocking CSS/JS:
CSS and JS is being loaded on the header and hence first it is being loaded in the visitor’s browser then your website data , hmm its a waste of time so better load them from the footer instead of header and your website load faster than the JSS and CSS, but beware that it might break the page style so enable them and see is their any broken to your web page or not. If you find that the page is being broken, then I will suggest you disable the options as your theme styling is important and no one wants the website looks odd to the visitors.
Additional WP Rocket configuration :
Now the Nest step is simple and easy to just go to Database tab and choose all the options blindly and in the last step on that page tab an option ” Schedule automatic cleanup ” set it to Daily Frequency.
Go to the Preload Tab > Choose mark: Activate Sitemap-based cache preloading.
Again choose Mark Preload bot: Automatic
The last step is to click on the Save Changes
CloudFlare Optimization combining with WP Rocket
CloudFlare is one of the top CDN providers in today’s internet world and it is performing well for optimizing and increasing the website performance effectively. If you love Cloudflare then you will also love their new CloudFlare DNS which is free to use and moreover it is the second fastest DNS provider after Google DNS.

You need to sign up in CloudFlare, and we will learn how to speed up a website with CloudFlare so add your website as shown in our below image:

After the scanning is completed, you need to click on Continue Setup, and it will show you the DNS page for verifying whether the DNS and IP are being scanned properly or not, then Click on Continue Button. The Next page will show you for choosing the plans page where we are going to choose the free plan only as our Private hosting users are getting free Railgun features supported by CloudFlare Railgun features free.
We are going to choose the Free Plan of CloudFlare in the beginning, and if you are satisfied with the free plan and want to upgrade for more page rules and other features, then we do suggest you try PRO plan which is better. So now check out the below screenshot which will point you to the free plan screenshot and click on Continue:

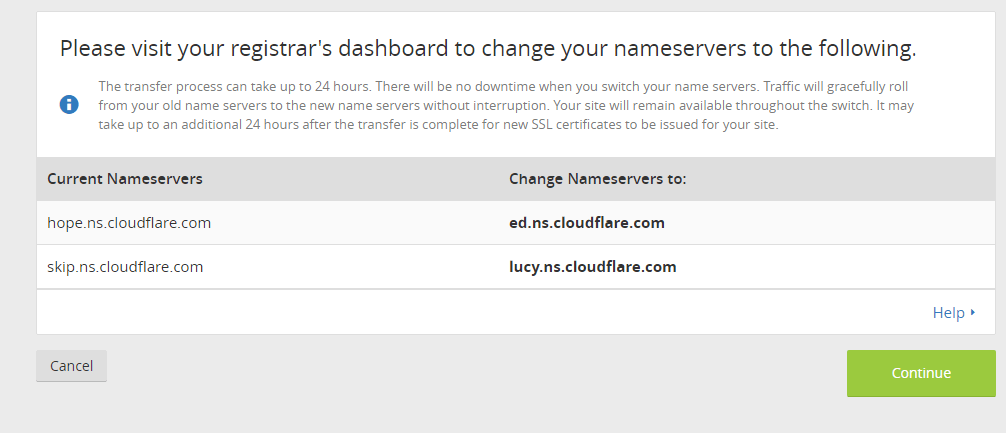
Now we need to replace the old nameservers to new CloudFlare nameserver and serve your website as CloudFlare resolver but don’t worry your website will not be put under downtime. So replace the nameservers shown on the left with the nameserver shown on the right side.Your website is being protected by CloudFlare DDoS protection service, so it is good to go with CloudFlare.
Wait for 24 hours for your website to be served from CloudFlare via original hosting server, as CloudFlare works as CDN from the front end but on the backend your server is working. So to boost your website performance, we need to add some tweak to CloudFlare to make it faster and show cached version to your visitors and hence reduce the CPU and RAM usage.
Boost Website with CloudFlare Optimization
1. Moving to the Speed Tab we will do check the following Options for the optimization
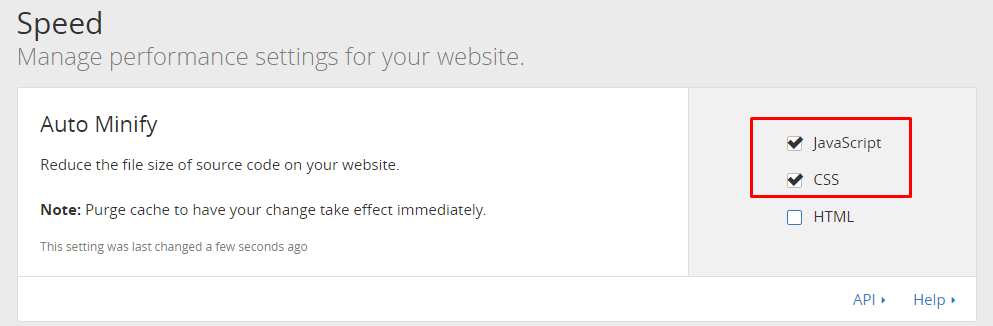
Note: Why we have not enabled HTML Minify?
Because Minify HTML here will make the whole website minify the HTML including your Google Analytic codes and other because CloudFlare minifies so much that it ignores the respect of any HTML codes like Alexa Analytic codes too, so it is better to remain unchecked.
2. Next, we will scroll below to go for the Railgun Activation
It is just simple one click and set. Check the below image for the clarification.
Note: Railgun is not provided by all the hosting company to improve website performance so you may not find this option to enable this features or else you can buy a business plan to get this feature.
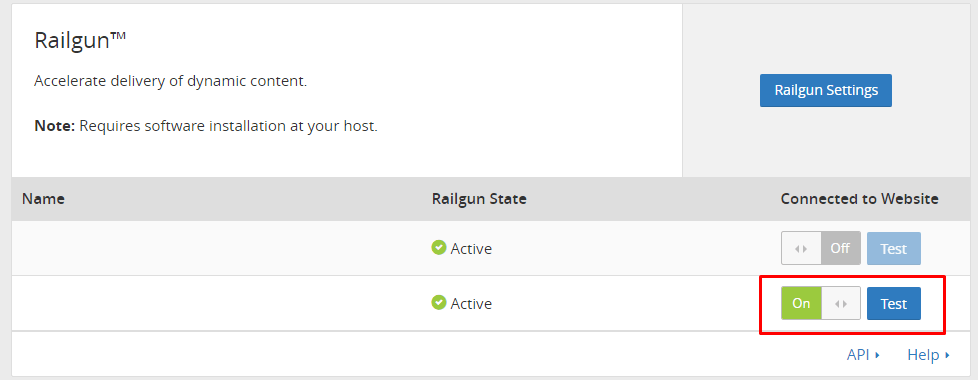
After you Turn On Respective Server Railgun, your website will be boosted up by CloudFlare’s Railgun. Now click on Test button to check whether your website is enabled for Railgun features successfully or not, if it is failed then you need to contact CloudFlare team to fix this issue. The success page will show something like our below screenshot:

Now we are moving to the Page Rules TAB for the special caching so that we can do something amazing in case we are receiving high traffic at our low cost hosting plans. So check out the below screenshot for your first Page Rule.
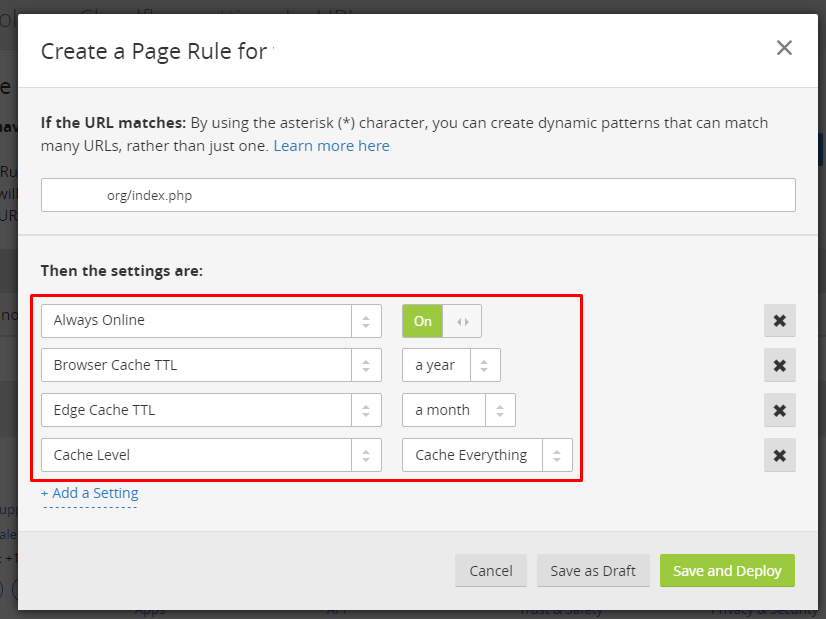
Second Page Rule for boosting website performance
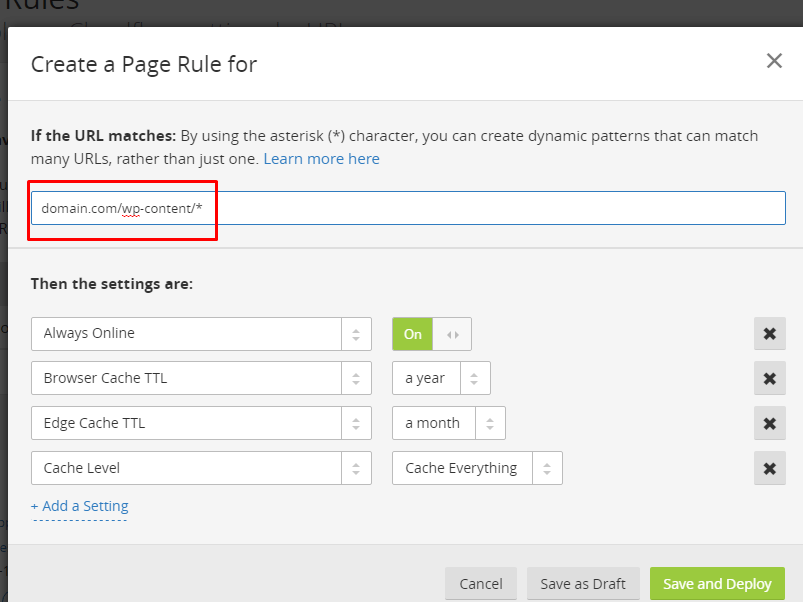
Third Page Rule for CloudFlare Security
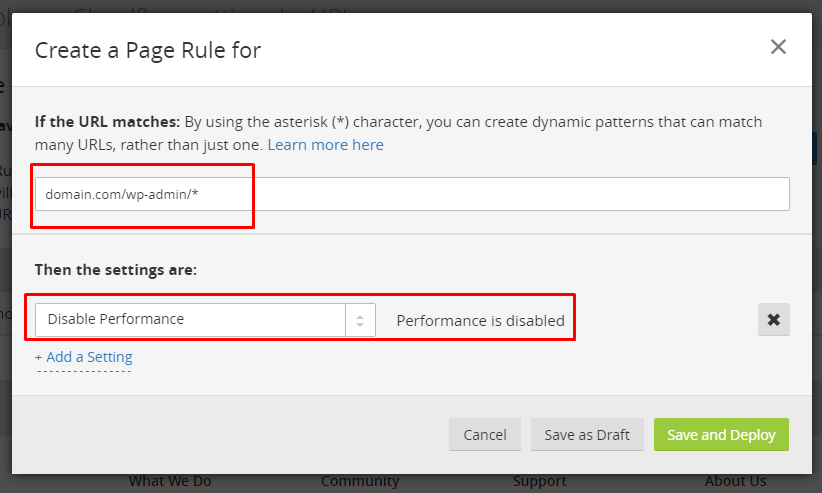
In this section, we have made our Dashboard page as uncached as it is the most required for uncached version display by us and our other members, writers.
So this will utilize three-page rules provided by the CloudFlare as free, and you are done for the CloudFlare optimization and after 10 minutes test website speed in Pingdom. The page will probably load in 1 Second or less.
Additionally, You can skip the below step as you have did everything above
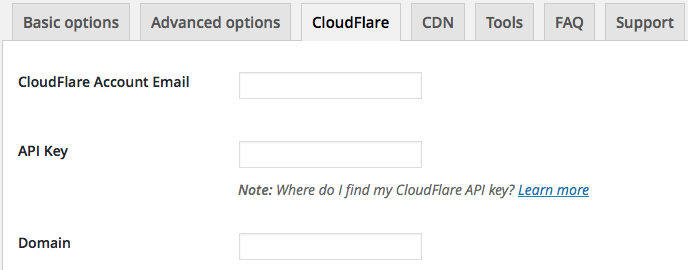
You Can Also Enable CloudFlare in WP Rocket Settings Page :
WP Rocket supports CloudFlare Integration for clearing the caches and Preloading the caches so I will show you how to integrate CloudFlare with WP Rocket.
Start the setup of CloudFlare in WP rocket :
Open the CDN tab inside WP Rocket setting page and check mark beside the option Enable CloudFlare settings tab.

Click Save Changes, and once the settings get saved you can see the CloudFlare tab. Now it will ask you to fill CloudFlare account email address, API key, and domain. You need to Login to CloudFlare to get the API Key.
You can also turn on Development Mode option remotely in WP Rocket Setting when you feel you need to make several changes in your website and do not want that changes to be reflected instantly.

WP rocket also provides auto optimization options for the CloudFlare users for instant optimization, So when you will enable Auto Optimal CloudFlare settings, WP Rocket will enable its set of options in CloudFlare for the best compatibility of your WordPress. These include minification, aggressive caching, and the deactivation of the CloudFlare Rocket Loader system too.

CloudFlare Setup is Completed and Now test your website for speed performance!
Features of WP Rocket
- You can install WP rocket in your WordPress website by uploading the plugin and then activating it simply.
- Wp rocket Supports inbuilt WooCommerce where you do not have to put extra effort
- You can minify the CSS and JS but some WordPress themes do not support it so be sure to have a better check on it.
- Prefetch DNS requests help the more speeding the WordPress website where you can mention the URL to prefetch the data.
- Lazy loading image helps in loading the texts first then proceed with the loading of the images.
Conclusion :
If you want to compare wp rocket vs w3 total cache then I will say WP Rocket wins on the configuration and setup is easy.WP rocket comes under premium but their support is really great and unlike W3 total cache configuration it is too difficult.
WP Rocket is the best plugin
I have used it and reviewed that this plugin is the best for caching with ultimate options.
WP Rocket plugin really helps the Wordpress to Optimize the performance and caching the pages to fine tune the page loading time.